The login screen presented on the web browser usually needs a custom profile to be extensively modified.
But there is a way to change some settings on Niagara to provide some basic level of customization to the standard login screen, including:
- Adding a custom logo
- Showing a different title (by default the station name is shown instead)
Important note for versions 4.10.3.20 and 4.11.2.18: with the newer versions of Niagara, it seems the use of an image file for the login screen within the "Files" section of the station has been removed. Only images contained within a jar module can be used (see "Login Screen Customization Overview" in the "Help - Help Contents" section of Niagara), making this feature accessible only to Niagara developers. We are checking with Tridium if this limitation is going to be maintained from these versions onward, or if Tridium will re-enable the use of Image files.
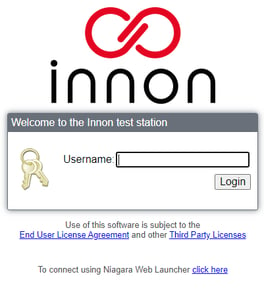
Adding a logo
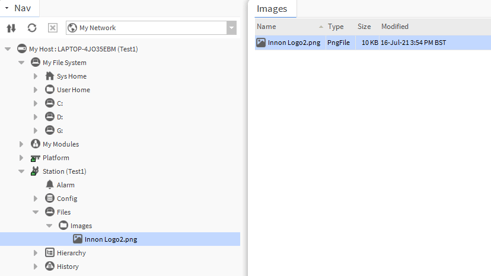
- Add your logo image to the station file section. Use the "My File System" section to find your file, copy it then paste it in a dedicated folder within the "Files" section of your station
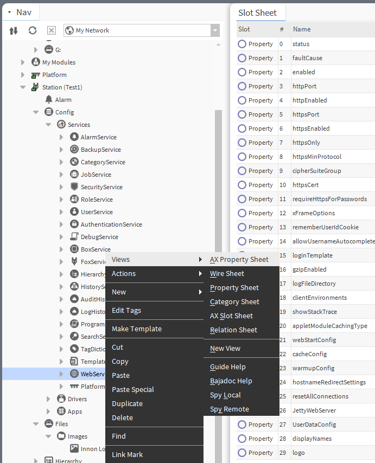
- Expand the "Config - Services" section, find the "WebService", right click on it and select the Slot Sheet view
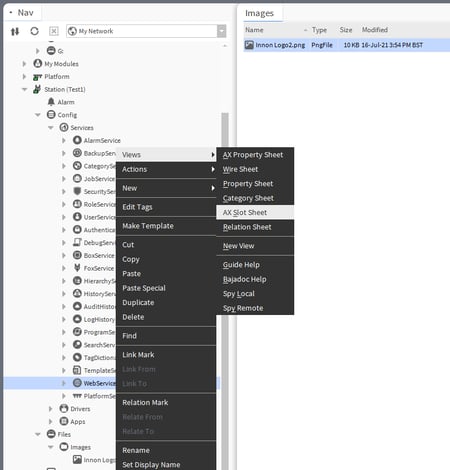
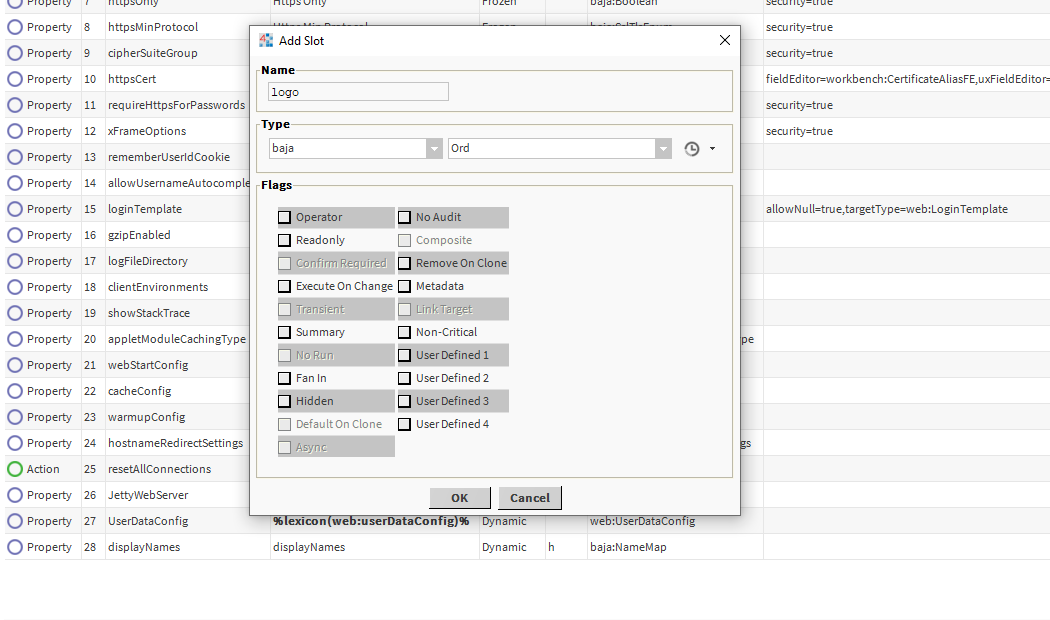
- Right click below the last slot (empty space) and select "Add slot". Enter the name "logo" and type "baja - Ord". No flags selected.
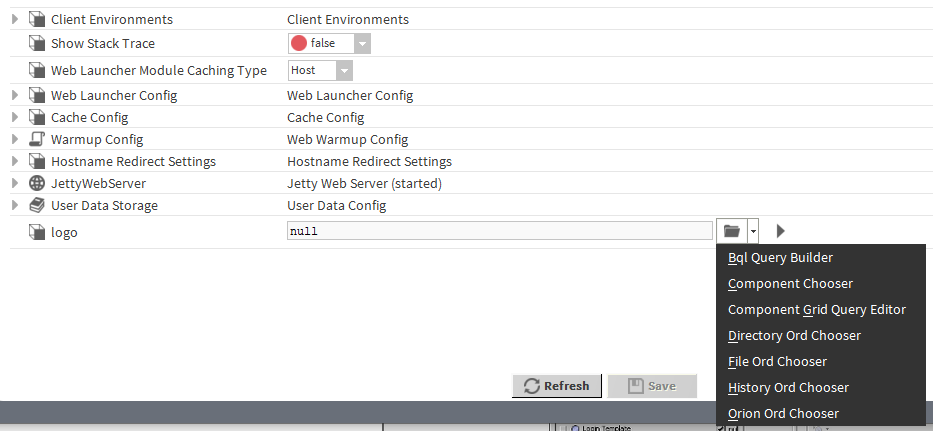
- Right click again on the WebService, but this time select the Property Sheet view
- Look at the last property "logo" and select the File Ord Chooser
- Find your image and select open
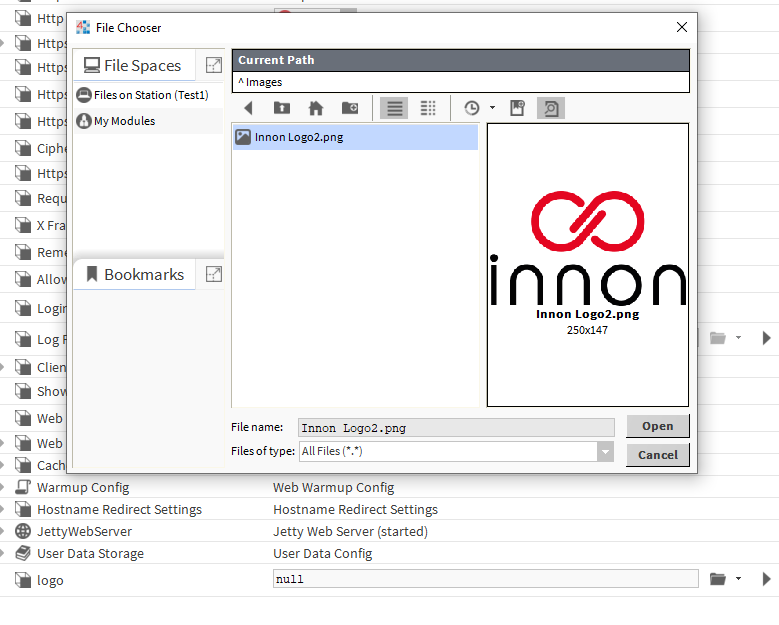
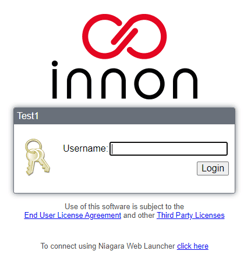
- Now save your work. The logo should be displayed on the login page. Adjust the size of the logo as needed
Changing the title displayed on the login page
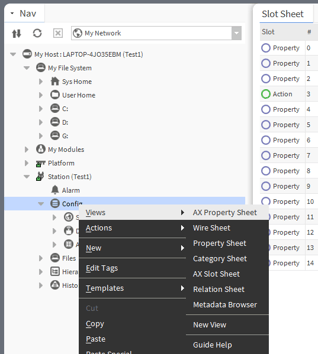
- Right click on the station "Config" section. Then select the Slot Sheet view
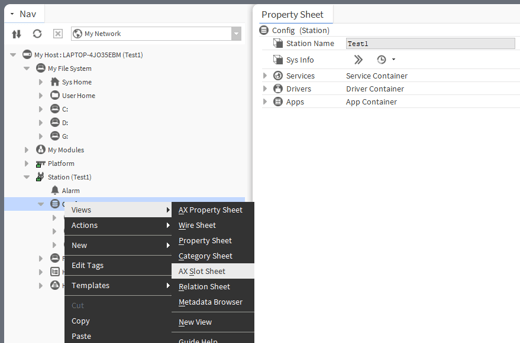
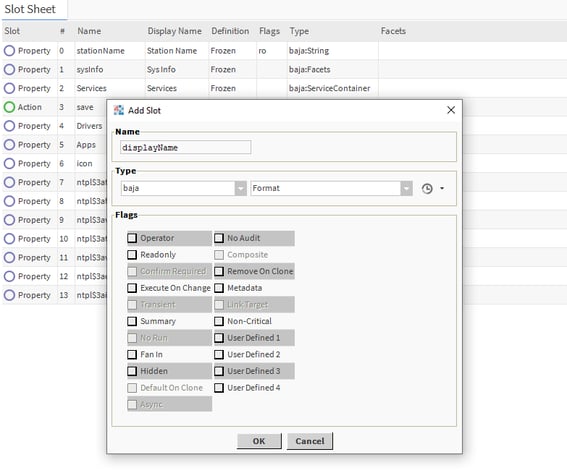
- Right click below the last slot (empty space) and select "Add slot". Enter the name "displayName" and type "baja - Format". No flags selected.
- Right click again on Config, but this time select the Property Sheet view
- Enter the desired login text under the "displayName" property

- Now save your work. The new text should be displayed now on the login page instead of the station name