Please note this only applies to 24v valves.
First of all, you will need to familiarise yourself with the FCU controller, as this controller is made specially for Fan Coil Units and has an application (software) made by the manufacturer which is already installed on the controller. At the end of the article ther are some training videos.
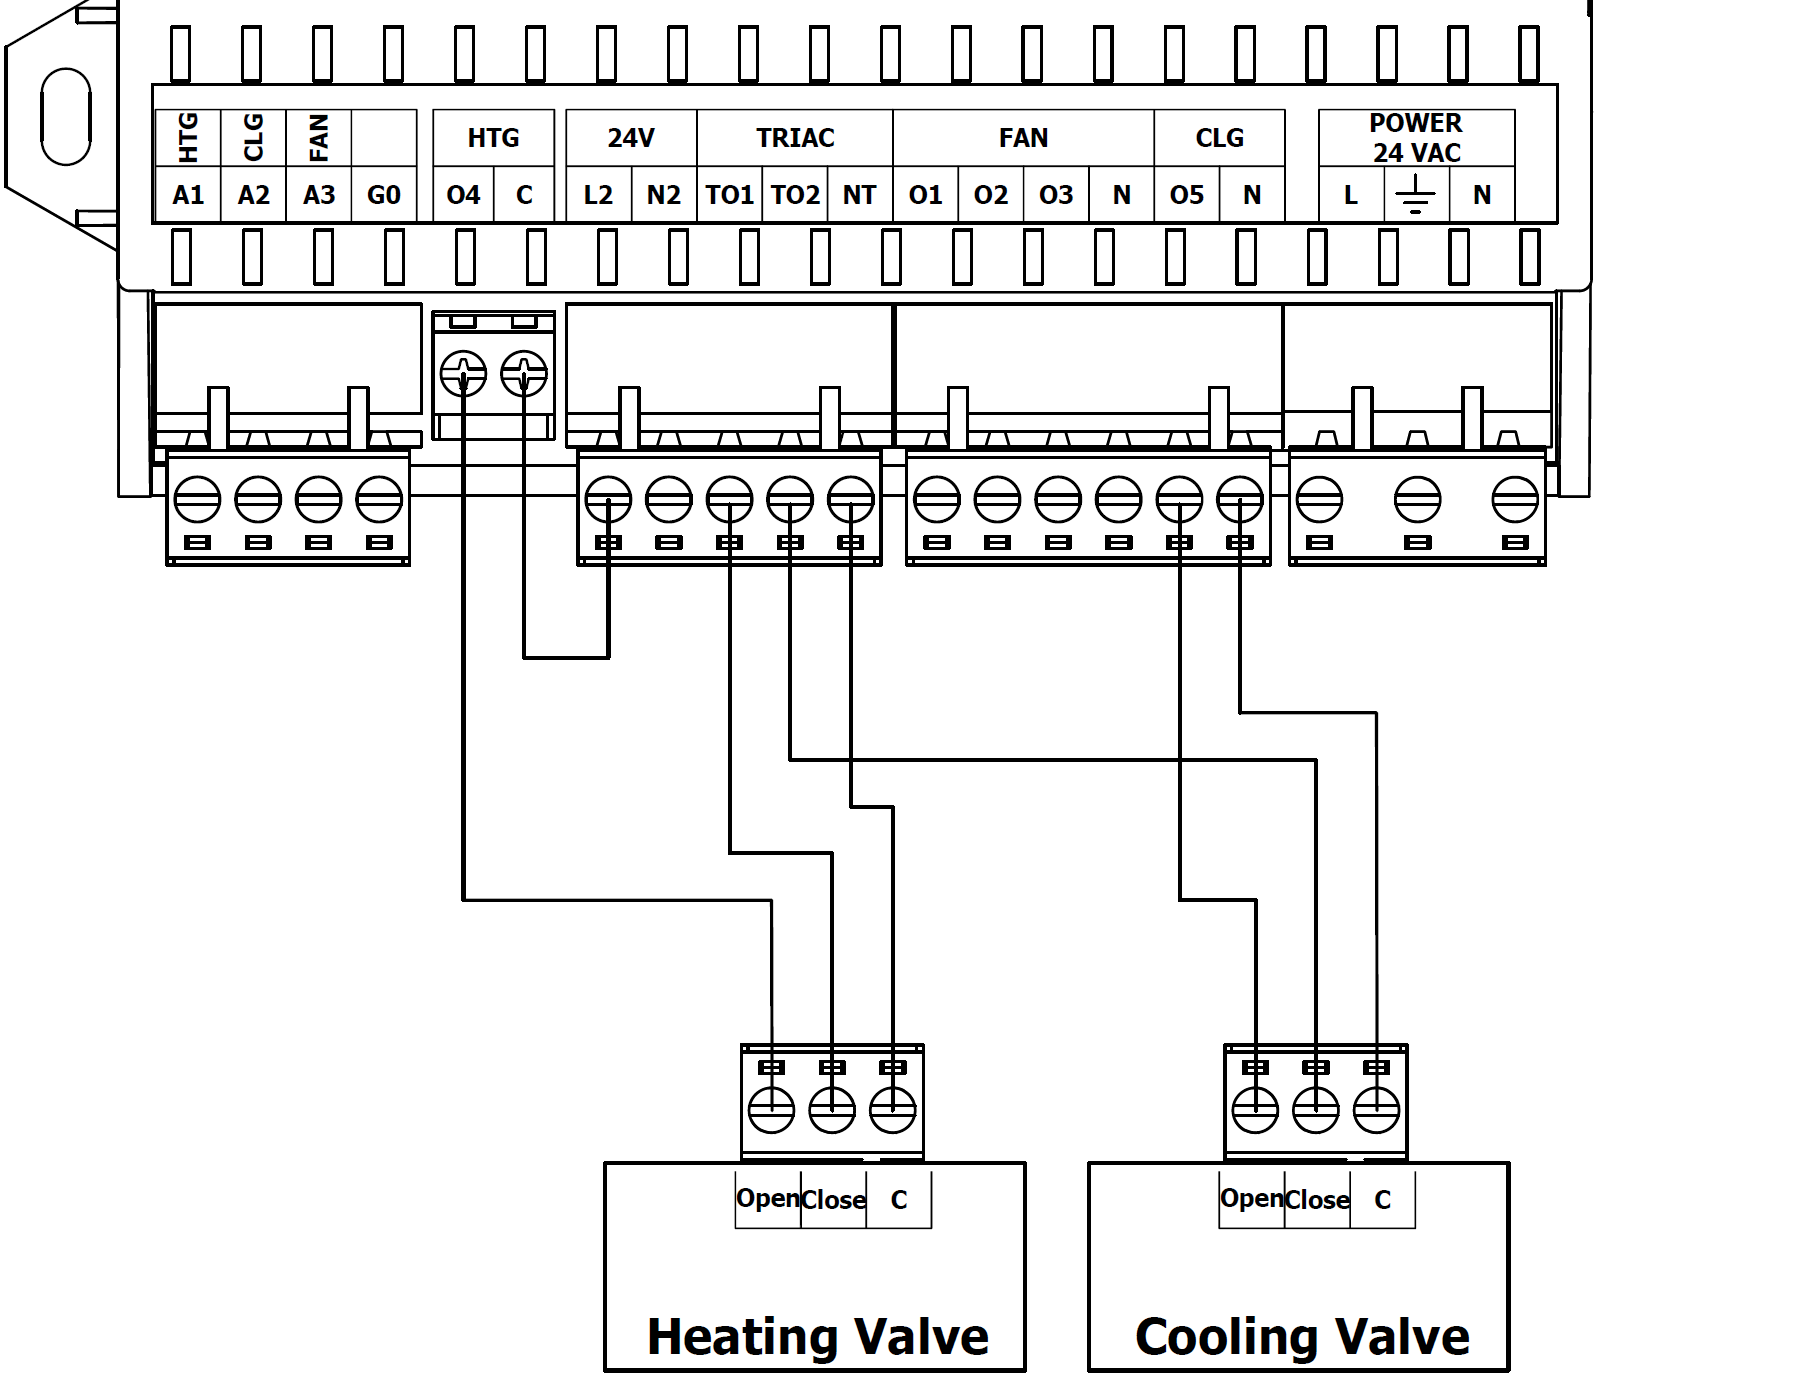
Connecting the raise-lower valves to these controllers can be done as shown in the schematic below:
Because the default application made by the manufacturer doesn't have this kind of valves and it is made for 2-way normally closed valves, you will need to modify the logic inside the controller.
- Please set DIP switch 4 on the CFG section to ON position to enable the Analog mode for heating and cooling.
- Open the FCU Updater software, connect the USB to the FCU controller and to your PC
- Open a Project or make a new one.
- Click on SOX button and in the SOX pop-up window press "Begin Communication"
- Open iSMA Tool software and connect to the FCU controller - IP: 127.0.0.1
If you don't have the IP in the Workspace Tree you will need to add a new device, by right-clicking on a folder and selecting Add Device: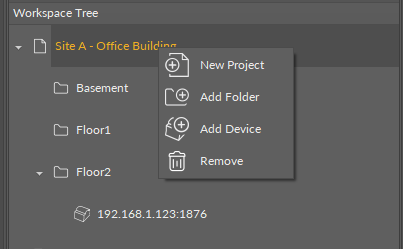 Enter the 127.0.0.1 IP into the Host
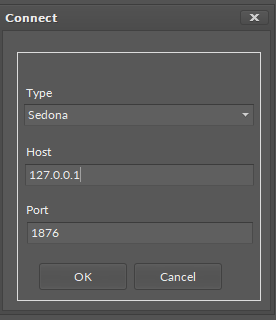
- The default password of an FCU controller is Username: "admin" and Password: empty (there is no password)
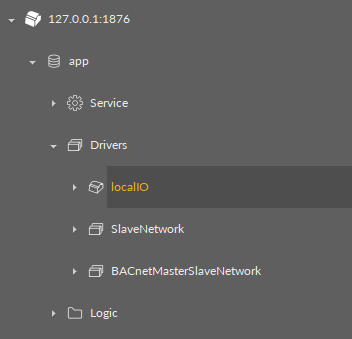
- You will need to navigate to the LocalIO driver and open the Wire Sheet view
- Find the Heating and Cooling Points
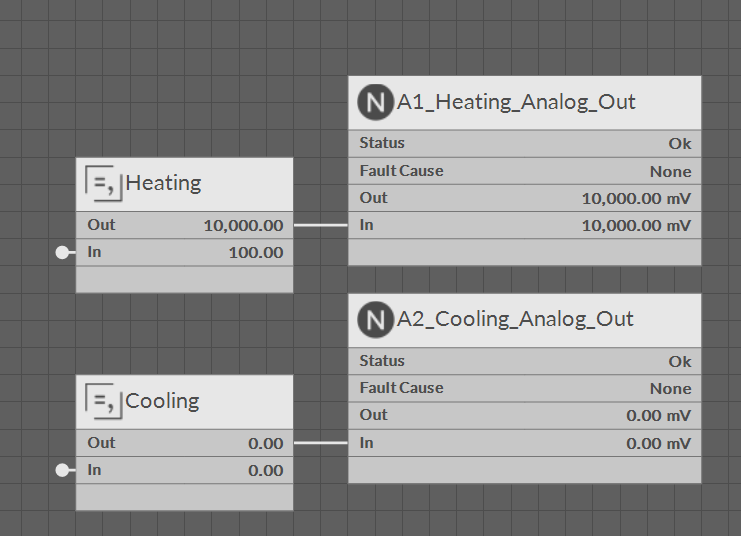
- Delete the links to the A1 and A2 outputs
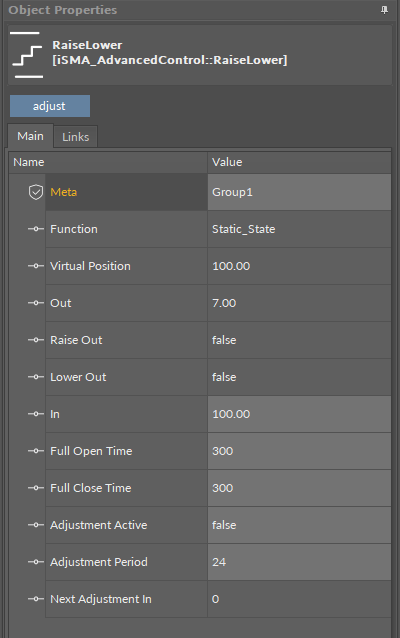
- Add the RaiseLower block from the Device Kits - iSMA_AdvancedControl to the Wire Sheet

- Click on the RaiseLower block and on the right hand side you will see the block's properties, here you will need to set the correct Full OpenTime and Full Close Time (the value is in seconds) and the Adjustment Period (this value is in hours)
- Link the In slot of the Heating/Cooling (the value from the input slot is 0-100%) to the Input slot of the RaiseLower block
And the RaiseOut slot to O5_Output point and the LowerOut slot to the T1_Output point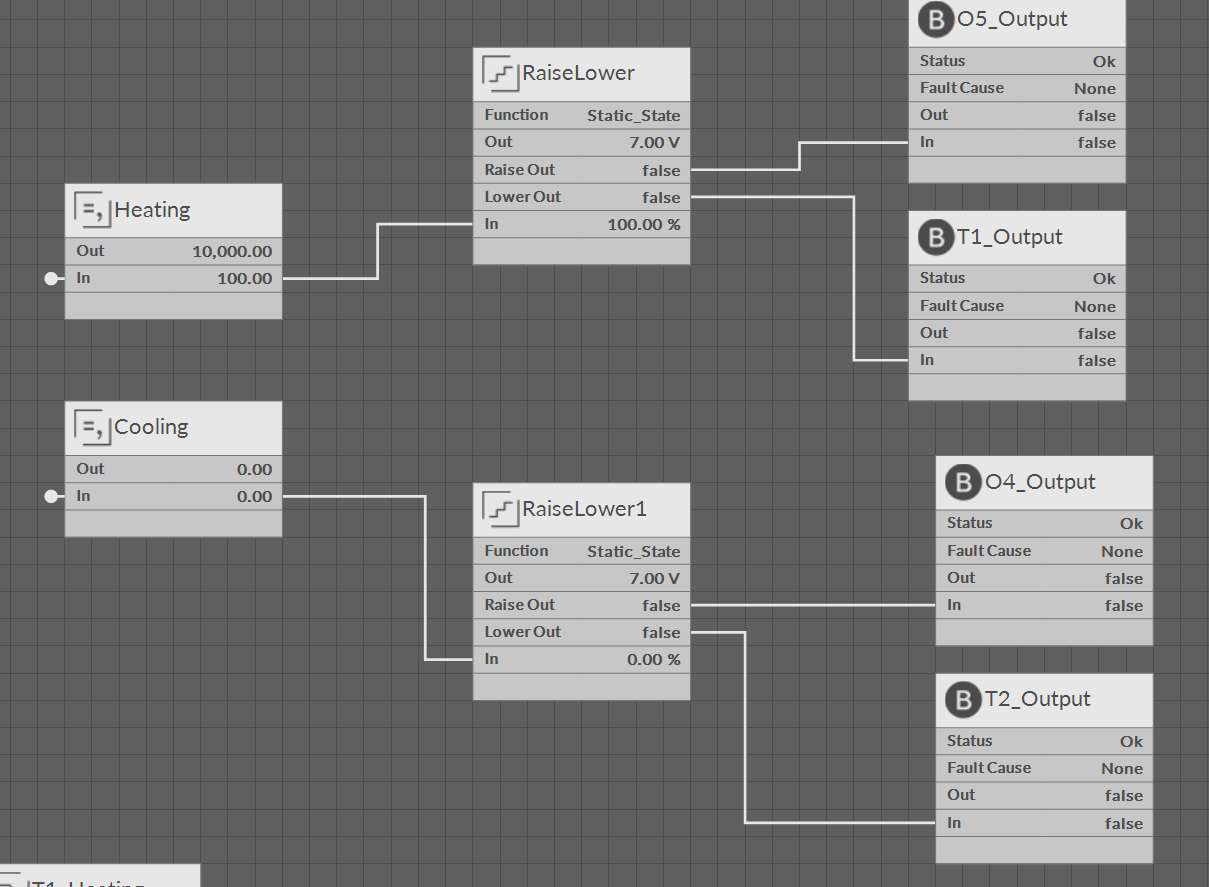
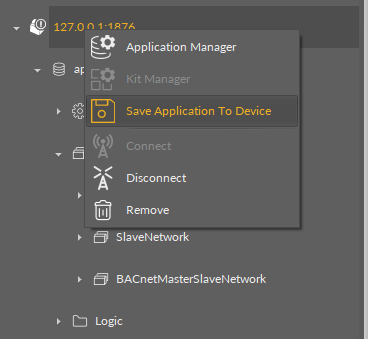
- The last step is to save the application in the controller. You will need to right-click on the IP connection and select Save Application to Device.
For more information on how to use the iSMA Tool with the FCU Controller and FCU Updater please see below some videos made by the manufacturer.
How to connect to an FCU controller:
FCU Updater
- At minute 8 it will show you how to perform a backup of the application once you finish the modifications - please restart the FCU Updater before you do a backup.
- At minute 9.30 it will show you how to Upload the application to another controller from the backup.