First, you’ll need to log into your Niagara Central account.

Once logged in, from the main navigation go across to “Licenses” and from the sub-menu select “Projects”

The Projects screen will give you a list of folders you have in your account. You will need to select the project related to your license (for the purpose of this article we are selecting the Temp folder)

From the next screen look down the Host ID column and locate the project relevant to your license and click on the name.

Once the next screen opens from the menu on the right side of the screen select “More” and from the submenu click on “Download License”.

If you want to move the license to a different folder or create a new one use the “More” tab again and select “Move License” from the sub-menu.
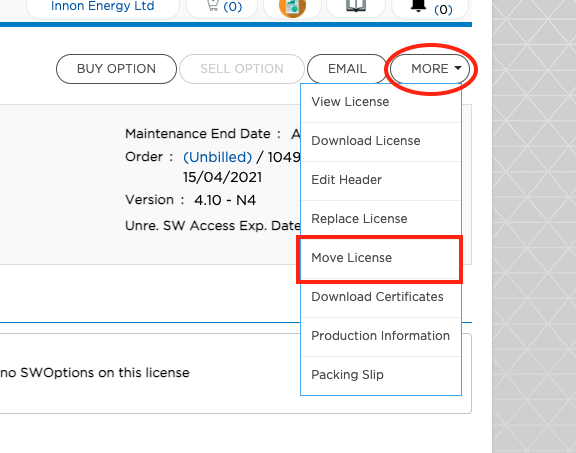
On the next screen, you can select one of your existing project locations or create a new project by clicking on the new project option

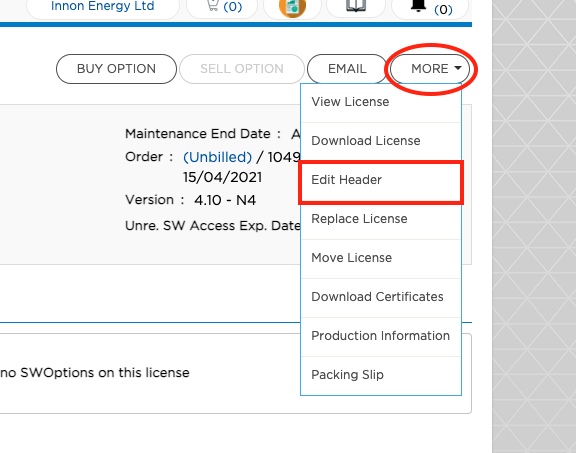
Renaming a Licence
You will need to go to the “More” tab and select the “Edit Header”
Does all of my team have access to Niagara Central?
To see who from your organization has access to your Niagara Central account, click on “Organization” tab in the menu and select “Users” from the submenu

If you need to add additional members to your account please complete our Niagara Central Users form that can be accessed here. Please complete this form and return it back to us at office@innon.co.uk
Keeping your account active
If you don’t log into your account for 2-3 months, the account will become locked, so we recommend that you log in monthly to prevent this from happening. If your account does become locked you can email us at office@innon.co.uk