You are getting used to develop simple program objects for your station, but every time you compile them you get a message saying the "Program is not signed"
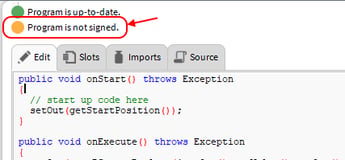
You might also have noticed the Application Director console reports the warning.
In this article we will try providing a quick solution to sign your own Program Objects.
The article assumes you already have some base level knowledge of certificates (understand what they are and what they are used for as a minimum).
Everything starts from your Workbench
We need a main certificate in our Workbench to be used for signing our Program Objects, so we can start by creating one.
We need to go to the top drop down menu on the Workbench and select "Tools - Certificate Management". Note: do not open the Certificate Management of your Platform. That is different, and will be used for our running stations, not for this purpose.
On the "User Key Store" tab, press "New" to create a new certificate.
Fill in all the required fields.
Make sure you change the "Not After" date so the certificate does not expire in just 1 year.
Also select the specific "Certificate Usage" as "Code Signing"
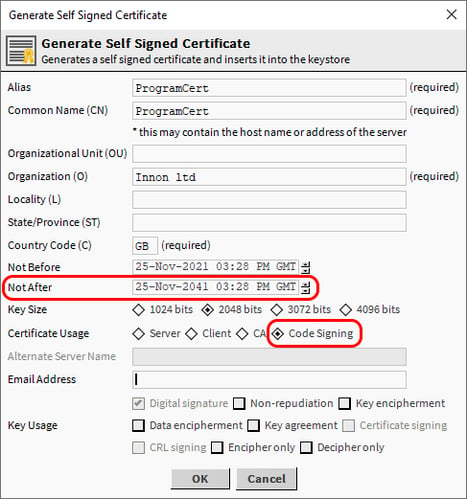
Press "OK" and set a password for your certificate. Remember: this password will be asked by the workbench at the point of compiling your code!

Now select the new certificate, then press the "Export" button below
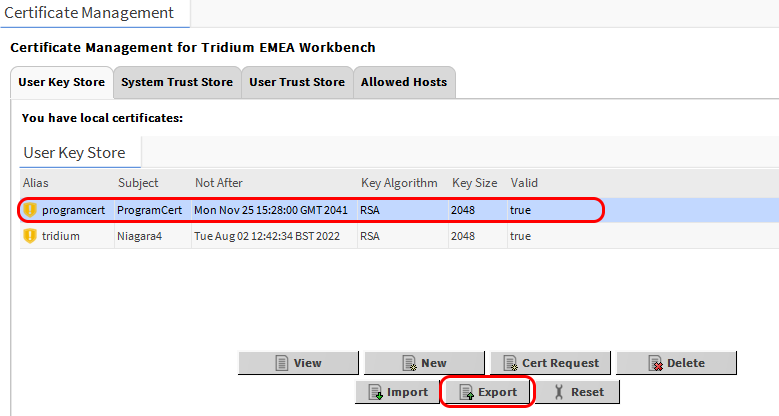
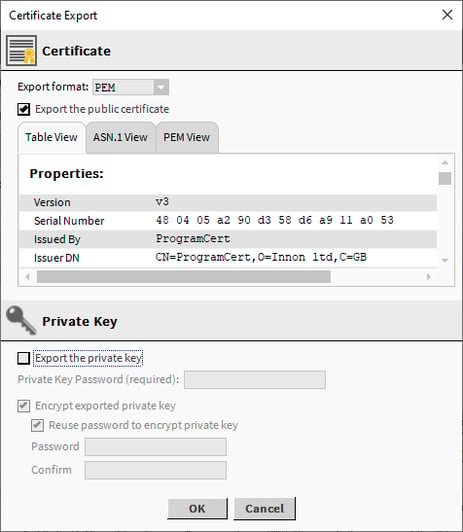
Export the certificate without the private key. You will be prompted then to give your certificate file a name and store it in your computer.
We would also recommend to export the certificate again, this time with the private key included, and store it with an indicative name, in case you want to transfer it into a different machine.
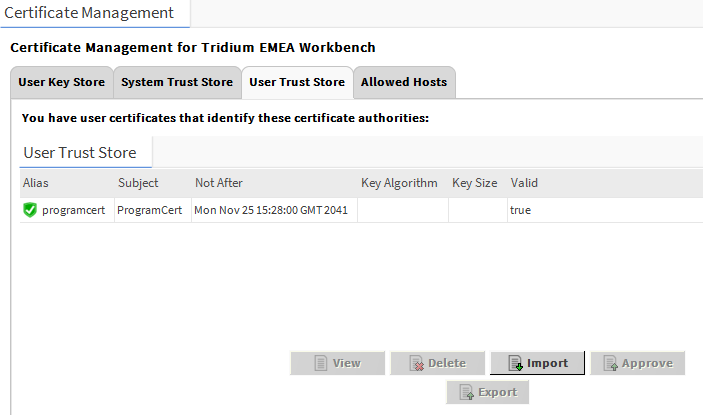
Change tab and move to the "User Trust Store".
From there, press the button "Import" at the bottom and select the certificate without the private key. It should appear in green as accepted in the windows above
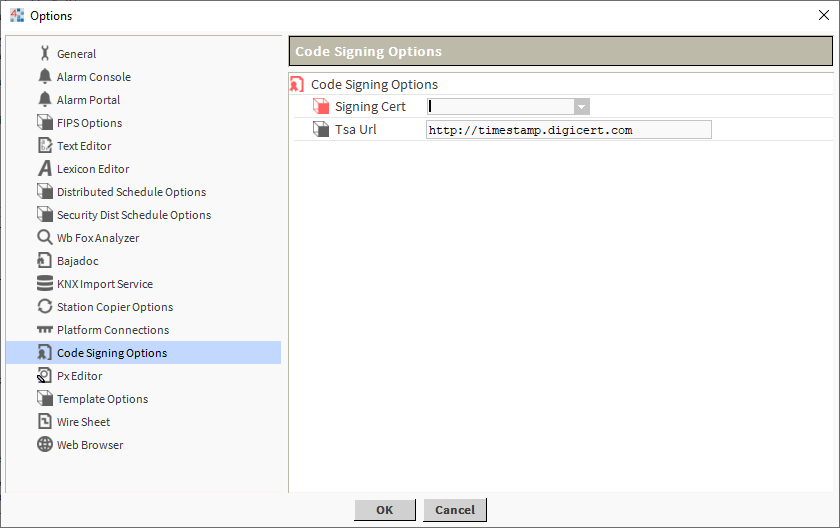
Now back to the top drop down menu, select "Tools - Options"
Find the "Code Signing Options" on the left hand side, and on the "Signing Cert" section select the certificate we have just created and accepted on our Workbench. Then press OK to confirm.

Add the trust certificate to your platform to complete
Now you can open the local host Platform, and double click the platform Certificate Management.
Select the tab "User Trust Store", then press the button "Import" and select again the certificate without the private key.
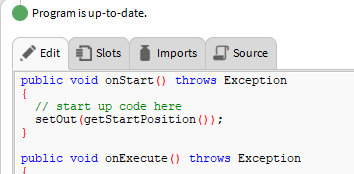
On the station running locally, you can now compile your code.
Note that the first time the Workbench will ask for your password (yes, the one we selected when we created the certificate!). Add the password and see that the code now compiles with no certificate error
And any Jace that need to compile the program
If you try compiling code on a Jace, it will return the "Certificate not trusted" until you add the certificate to the Jace Certificate Management too.

On the Platform, double click the "Certificate Management", then select the tab "User Trust Store".
In there, press "Import" and select your certificate without private key. Your program objects will now compile correctly.
Reverting back to unsigned code? Easy.
If you prefer not to sign your code, it is easy to revert back.
On the top drop down menu of your Workbench, select "Tools - Options".
Then find the "Code Signing Options" on the left side.
On the "Signing Cert" option, select the content there and press "Delete" or "Backspace" on your keyboard to erase its content, then press "OK".
From now on the Program Objects will be compiled again without being signed